CLion
CLion is a cross-platform IDE for C and C++ by JetBrains, which is tailored for embedded development. This guide will show you how to build, run, and debug generated CMake projects using CLion.
Initial Setup
For first-time users of CLion:
- Access
File > Settingsor use the shortcutCtrl + Alt + S. - Go to
Build, Execution, Deployment > Embedded Development. - Define the paths for the OpenOCD executable and STM32CubeMX executable.
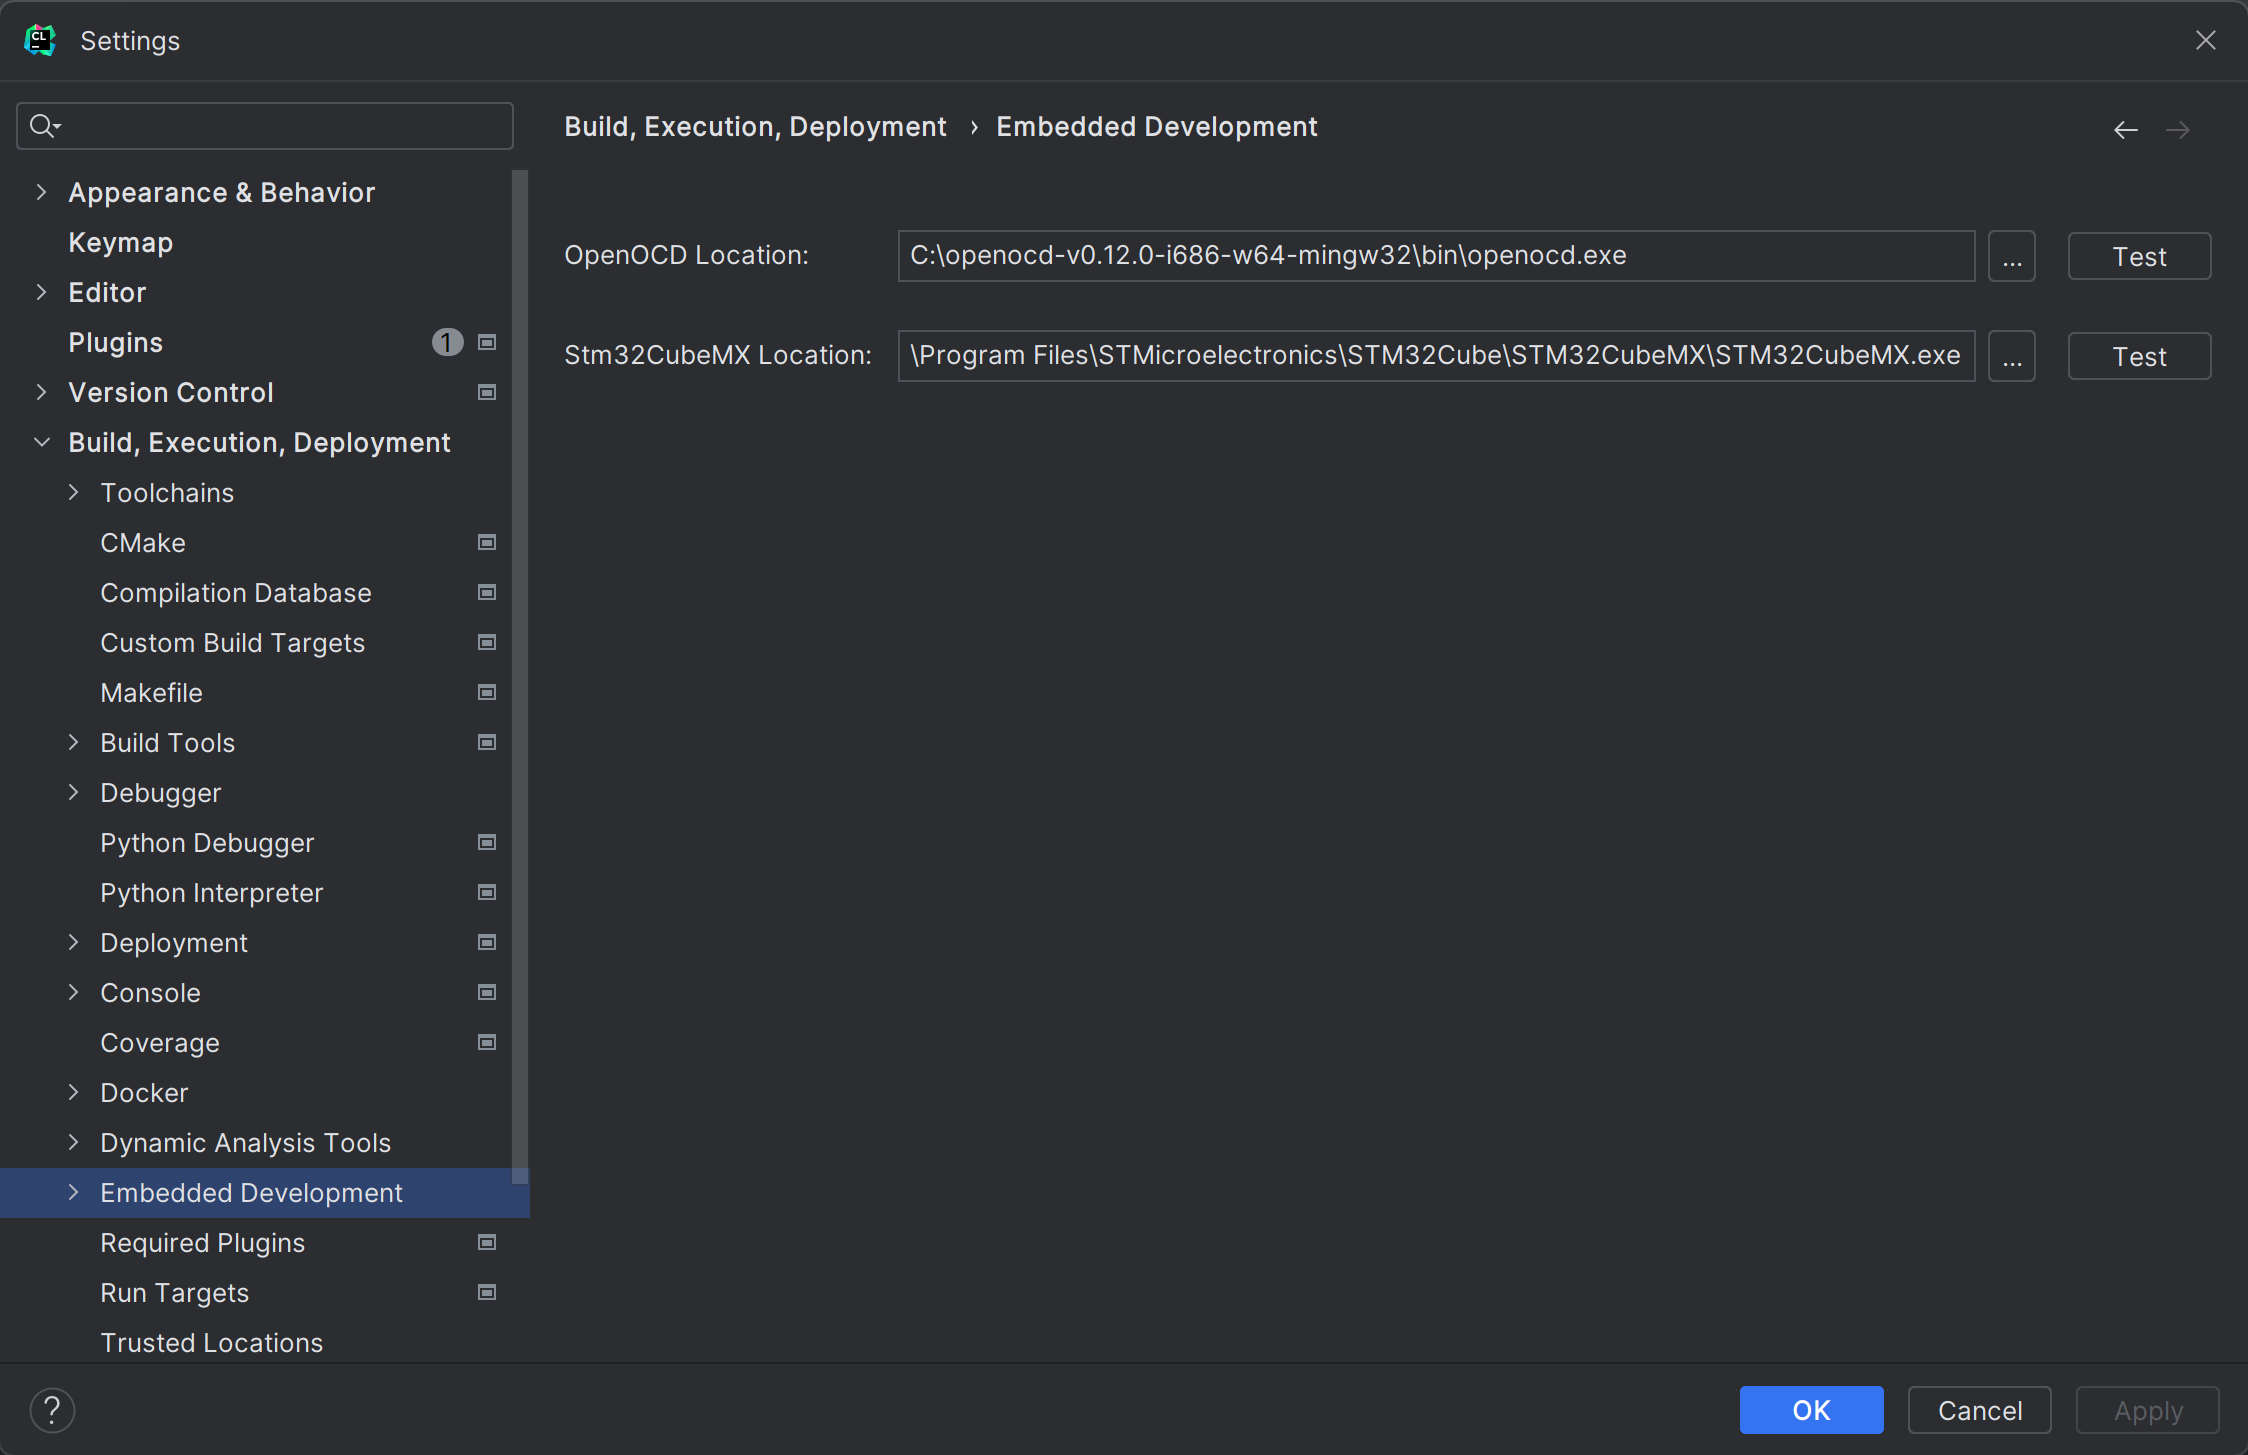
- Click
Applyand thenOK.
Building the Project
- Open the project directory in CLion.
- Click
Buildor pressCtrl + F9.
Running the Project
With OpenOCD
tip
OpenOCD is an open-source tool that provides on-chip programming and debugging support. For most types of adapters (eg. CMSIS-DAP or ST-Link), OpenOCD is a good choice to drive them. However, a significant exclusion is J-Link adapter, which is recommended to use JLink GDB Server for better performance and advanced features.
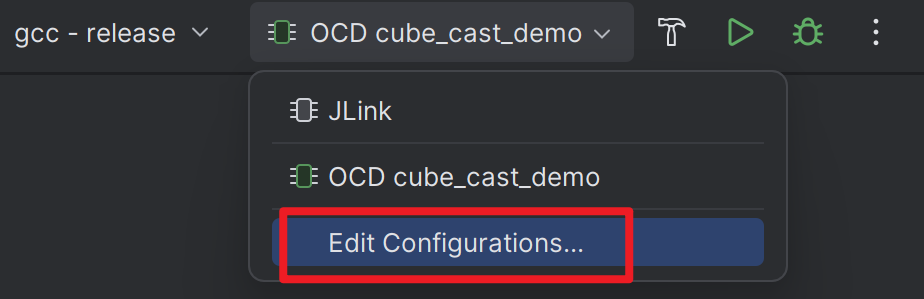
- Edit
openocd.cfgto configure OpenOCD, see Configure OpenOCD to learn more. The default configuration is for CMSIS-DAP adapter. - Choose Run Configurations:
OCD {project-name}. - Click
Runor pressShift + F10.
Debugging
With OpenOCD
- Edit
openocd.cfgto configure OpenOCD, see Configure OpenOCD to learn more. The default configuration is for CMSIS-DAP adapter. - Select Run Configurations:
OCD {project-name}. - Click
Debugor pressShift + F9.
With JLink
- Select Run Configurations:
JLink. - Specify the JLink GDB Server path by editing Run Configurations.
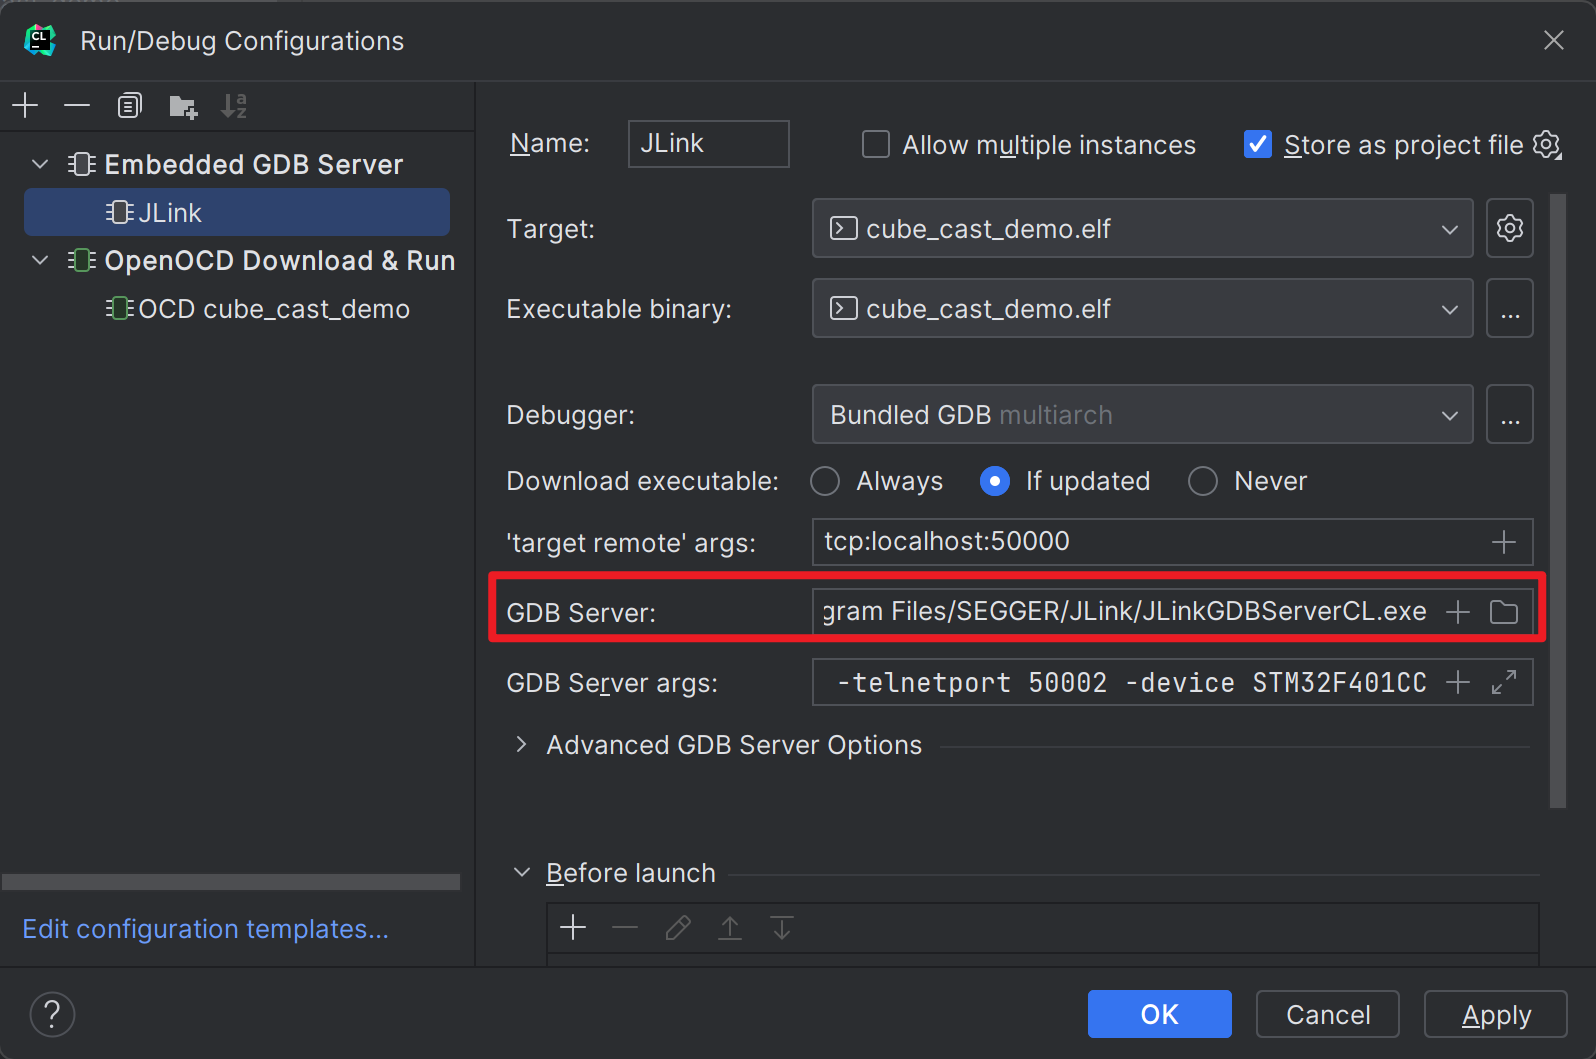
- Click
Debugor pressShift + F9.
Configure Peripheral View
Automatic configuration is not supported at the moment. You need manually download and load the SVD file for peripheral register viewing.